Feeds:
Posts
Comments

Posts Tagged ‘Cream Cheese Frosting’

1-DSC_1236

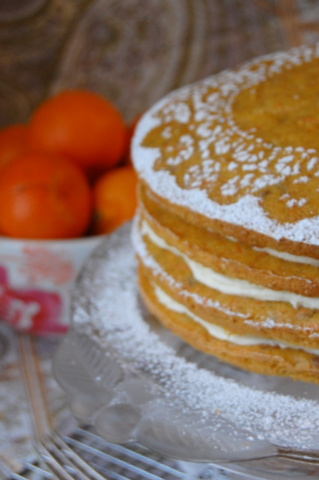
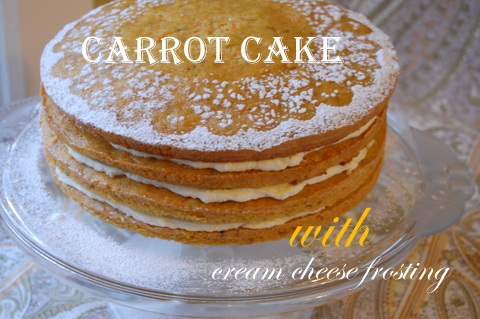
Happy Christmas everyone! I hope your holiday has been, and will continue to be filled with love, joy, family, friends and endless layers of sweetness like this fluffy carrot cake.

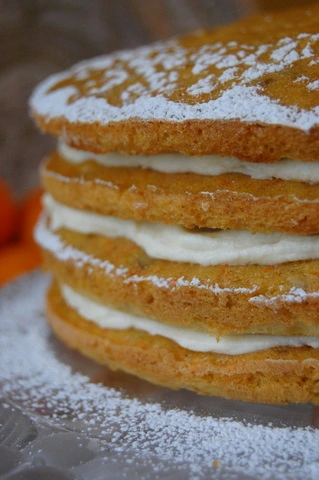
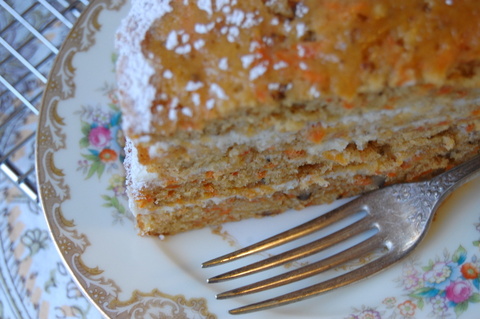
Carrot cake isn’t necessarily a conventional Christmas dessert, not like a steamed pudding or trifle anyway, but it does make a nice addition to the holiday feasting because it incorporates a lot of the foods we associate with the holidays.  The delicate layers of cake are full of sugar, spices, nuts, fruit and shredded carrots layered between thick, creamy cream cheese frosting for a smooth and satisfying finish to any holiday meal. It’s not overly sweet and can be a welcome change to some of the sweeter desserts being whipped up right now.

1-DSC_1291

Though I usually wrap the whole cake in frosting, this time I wanted to cut back on the richness a little and thought I’d just layer the cake with frosting and top it off with a sprinkle of powdered sugar.  I placed a doilie upside down on top of the cake and sprinkled powdered sugar with a little sifter around the edges until the holes in the doilie were covered.  The result was a pretty outline of the doilie to decorate the cake, without the heaviness of a lot of cream cheese frosting. My family was delighted with the results as they raved about the rich and satisfying taste of the cake without some of the extra calories that usually come with a lot of frosting.

1-DSC_1299

Wrapped entirely in frosting or filled just between the layers, this carrot cake is a delicious way to entertain family or friends during the holiday season because the ingredients can be adjusted to suit your preferences by changing golden raisins for dried currants, shredded coconut (my personal favorite) or pineapple chunks.

My sincere best wishes for a wonderful year of sweetness and joy!

1-DSC_1301

Carrot Cake with Cream Cheese Frosting

Adapted from Vintage Cakes by Julie Richardson

Ingredients

1 cup all-purpose flour

1 cup whole wheat flour

1 1/2 teaspoons baking powder

1/2 teaspoon baking soda

1/2 teaspoon fine sea salt

1 teaspoon cinnamon

1 teaspoon ground ginger

1/4 teaspoon ground nutmeg

11/2 cups granulated sugar

1/2 cup firmly packed brown sugar

3/4 cup canola oil

4 eggs, at room temperature

1/2 cup buttermilk, at room temperature

1 pound peeled and coarsely grated carrots (approximately 3 cups)

1/2 cup chopped walnuts, untoasted

1/2 cup golden raisins

Method

1. Center an oven rack and preheat the oven to 350 degrees F.

2. Sift together the flours, baking powder, soda, salt, ginger, cinnamon, and nutmeg in a bowl, then whisk the mixture by hand to ensure that the ingredients are well mixed.

3. In the bowl of a stand mixer fitted with the paddle attachment, combine the sugars with the oil on low-speed until the mixture resembles wet sand. As you make the batter, stop the mixer frequently and scrape the paddle and the sides of the bowl with a rubber spatula. Add the eggs one at a time, adding the next one as soon as the previous one has disappeared into the batter. Increase the speed to medium-high and blend for 3 minutes.  The thick batter will increase in volume and lighten in color. With the mixer on low-speed, add the flour mixture in three parts, alternating with the buttermilk in two parts, beginning and ending with the flour. After each addition, mix until just barely blended and stop and scrape the bowl.  Stop the mixer before the last of the flour has been incorporated and complete the blending by hand with a rubber spatula to ensure you do not over-beat the batter. Fold in the carrots, golden raisins and the walnuts.

4. Divide the batter evenly between four prepared pans.  Place the pans in the center of the oven and bake until the cakes are golden and spring back when lightly touched in the middle, 20 to 25 minutes.

5. Promptly run a knife around the edge of the pan to help the cake retract evenly from the sides while cooling. Cool the cakes in their pans for 10-12 minutes, taking extra care as they are fragile and could crack. Leave them to cool on the rack, top side up, until they reach room temperature and you are ready to assemble the cake.

6. To assemble the cake, place one of the layers, top side up, on a serving plate. If the cake is domed in the middle you may need to use a serrated knife to trim off the domed area.  Using a metal spatula, spread one-third of the frosting over the cake, spreading it slightly to the edge. Place the next layer of cake, top side down, on top of the frosted layer, remembering to trim any excessive doming first, if necessary.  Repeat again, ending with the last layer placed top side up on the frosting. Place a doilie upside down on top the cake and press it down until it sticks slightly. Fill a small sifter with a tablespoon of powdered sugar, taping it gently with your hand over the edges of the doilie until you have gone all the way around.  Carefully remove the doilie by lifting it gently up and away from the cake and you should have a lovely decorative pattern that will last for several hours.  If left overnight the powdered sugar will be absorbed into the cake so if you are entertaining, it may be best to leave this part until just before your guests arrive.

Notes:

This cake is fabulous the day it’s made but can be kept fresh for up to 2 days in an airtight container in the refrigerator due to the frosting.  Allow at least 1 hour for the cake to come to room temperature before serving. I’ve also frozen this cake with great results. Just let it defrost at room temperature and serve.

Cream Cheese Frosting

Adapted from Food Network Website
Ingredients
8 oz. unsalted butter, softened (I used salted butter and it was just as good)
8 oz. cream cheese, softened
4 cups powdered sugar (confectioner’s)
2 teaspoon vanilla extract
Method
1. In a large bowl, beat together the butter and cream cheese with an electric mixer.  With the mixer on low-speed, add the powdered sugar a cup at a time until smooth and creamy.  Beat in the vanilla extract.

Read Full Post »

It isn’t every day that your niece has a birthday. Just one day out of 364 other days. So it’s important to celebrate.

Celebrations are special and so are birthdays. They help us mark the passage of time and milestones that recognize changes in our lives. When you think about it, so many things in our lives are based on our birthday. When we can cast our vote, when we can get behind the wheel of a car, when we can get our first job or plan to retire from a career; all important milestones, all based on our birthday. It seems, that one special day, can make all the difference.

People in our lives make all the difference too. They can impact us in ways that matter.  Their personalities can grab us and kindle a flame that wasn’t there before. Sometimes that flame ignites and starts a fire and suddenly we’re better than we were before, because of that one person.

I’ve always believed that it’s important to impact people in positive ways whenever we can. To give in some way, so that someone else can feel good.  It doesn’t always come back to you, but often it does. I’ve always believed that the point of giving though, is not expecting something in return. Just giving. People don’t always accept what we give them. Sometimes it isn’t what they wanted or were looking for. But sometimes they do and that’s what makes giving worthwhile. Bringing happiness to someone else. Making them feel special, which in turn, makes us feel special.

That’s what this cake was about.  Celebrating.  Making a 17-year-old feel special … loved … and blessed. Which in turn, made me feel special, loved and blessed.

I’m feeling doubly blessed this Easter, as I think about all that’s been given to me.  I’m excited about celebrating life and hope and promise with my family this weekend. This cake was just the pre-celebration icing on my cake!  Whatever you’re celebrating this weekend, I hope it’s special and brings you joy.

This cake may look complicated, but it’s really not.  There are just 4 steps: make the cheesecake, bake the cake, whip the frosting and assemble.

I’ve tried several red velvet cake recipes and each had some positives but also some negatives.  This one however, is the best by far.  It’s got superb flavour and a great crumb and texture. It’s rich, moist and doesn’t taste weird or artificial. It mixes up really easily and the results are divine.

Most red velvet cheesecakes that I’ve seen, have a really thick centre.  For this celebration, I felt that I wanted less of a good thing and so I went with half the size most recipes call for. The result lended the perfect amount of taste and texture to make it a delicious combination. This cheesecake had a slightly firm texture that was rich and creamy. What’s the secret to preventing a cheesecake from cracking? Grease the pan and bake it in a hot water bath so that it can move easily while baking, so you won’t want to skip those two steps.

And finally, the frosting … you’ll either love it or  … you won’t.  Thankfully our family loved it. The dreamy flavour and the whipped creamy texture of this frosting had everyone licking their forks. As strange as it sounds, don’t let the ingredients or the cooking process deter you from experiencing what may well be, your all-time favourite frosting yet.

These 3 separate components; the cake, the cheesecake and the frosting came together to deliver a complete package.  A stand out cake that tasted as good as it looked. My husband thought it may have been the best cake I’ve made yet. Now that’s something worth celebrating!

Red Velvet Cheesecake

Makes a rich 9″ cake, 12-14 servings

The steps of this recipe can be completed over a two-day period. The cake and cheesecake layers can easily be made a day ahead of the icing and assembly.

Cheesecake:

Adapted from: RecipeGirl

One (8-ounce) package cream cheese, at room temperature

1/3 cup granulated white sugar

pinch of salt

1/8 cup sour cream

1/8 cup heavy whipping cream

1 teaspoon vanilla extract

Red Velvet Cake:

Cake adapted from: 17 and baking

2 1/2 cups cake flour

1 1/2 cups granulated white sugar

1 teaspoon baking soda

1 tablespoon cocoa powder

1 teaspoon salt

2 eggs, room temperature

1 1/2 cups vegetable oil

1 cup buttermilk, room temperature

1 teaspoon vanilla extract

1 teaspoon white vinegar

Red food colouring, as desired

Cream Cheese Frosting:

Frosting adapted from Tasty Kitchen

5 tablespoons flour

1 cup milk

1 teaspoon vanilla extract

1 cup butter

1 cup granulated white sugar

Directions:

1. Prepare the cheesecake layer:  Preheat oven to 325 degrees F. Place a large pan (one that’s larger than your springform pan) on the lower third rack of the oven.  Boil some water.  Spray a 9-inch springform pan with joystick spray and line the bottom with a round of parchment paper.  Place the pan on a double layer of foil and press the foil up and around the bottom of the pan to prevent any water from the water bath from seeping into the pan.

In a large bowl, use an electric mixer to mix the cream cheese, blending until it is nice and smooth and creamy.  Mix in sugar and salt and blend for 2 minutes, scraping down the sides of the bowl as needed.  Add eggs, one at a time, blending after each addition.  Finally, mix in the sour cream, whipping cream and vanilla.  Mix until smooth.

Pour the batter into the prepared pan.  Set the springform pan into the shallow pan in the preheated oven. Carefully pour the hot water from the boiling water into the larger pan until it reaches 1 inch up the side of the springform pan.  Bake the cheesecake for 30-35 minutes.  It should be set to the touch and not jiggly.  Remove the cheesecake from the shallow pan and let it cool on a wire rack for at least an hour.  When it has cooled, cover with plastic wrap and place the pan into the fridge until firm.  This can be done for an hour or overnight.

2. Prepare the cake layer: Preheat the oven to 350 degrees F.  Grease and flour two-9 inch round baking pans.  In a large bowl, sift together flour, sugar, cocoa powder, baking soda and salt.  In a large bowl, use an electric mixer to beat the eggs, oil, buttermilk, vanilla, vinegar and desired amount of red gel food colouring, I used Americana super red gel food colouring, until well combined. I used 2 squirts (which I think is approximately 10 ml).

Beat on medium-low speed for 1 minute, until blended. Scrape the sides and bottom of the bowl with a rubber spatula. Beat on high-speed for 2 minutes. Dividing equally, spread the batter evenly into the prepared pans. Bake 25-30 minutes or until a toothpick or skewer inserted into the centre comes out with only a few moist crumbs attached.  Cool the cakes in the pans for 10 minutes, then run a knife around the edges.  Invert the cakes onto a cooling rack and cool completely.

3. Prepare the frosting:  In a small saucepan, whisk flour into milk and place over low heat, stirring constantly, until it thickens (into a roux). You want it to be very thick, definitely thicker than cake mix, and more like a brownie mix. Remove from heat, add the vanilla extract and let it cool to room temperature. Place a piece of plastic wrap over the top to prevent any dry edges while it  cools. If you are in a hurry, place the saucepan over ice in the sink for approximately 10 minutes, until the mixture cools. The roux must be  completely cool before you use it in the next step.

While the mixture is cooling, beat the butter in a medium bowl with an electric mixer until it’s light and creamy.  I use my hand mixer for this because my Kitchen Aid can’t reach such a small amount.  Scrape down the bottom and sides of the bowl until there are no lumps.  Add the sugar and continue beating until its super light and fluffy.  You don’t want any sugar graininess at all.

Add the completely cooled milk/flour/vanilla mixture and beat on high-speed until light and fluffy (8-10 minutes or longer if necessary).  If the icing looks separated, keep beating until it combines and resembles whipped cream in a soft, creamy and luxurious way.

4. Assemble the cake: Use a cake leveler or serrated knife to level the tops of the red velvet cakes.  If the cakes came out of the oven already level, you can skip this step. I’ve found that insulated pan wraps by Wilton work well at preventing cakes from doming. Remove the parchment paper and put one of the layers cut side up, in the centre of a cake or serving plate.  Spread a very small amount of frosting on top, just enough to cover the cake in a thin layer.

Remove the cheesecake from the fridge, peel off the plastic wrap and open up the springform pan. With the bottom of the springform pan still attached, gently flip the cheesecake over onto the red velvet cake.  With a knife, lift off the bottom of  the springform pan and peel off the parchment paper.

If your cheesecake is wider than your red velvet cake, gently saw a knife around the edge and trim the excess. Spread another very thin layer of frosting on the top of the cheesecake.  Flip the remaining layer of red velvet cake, cut side down, on top. Peel off the parchment paper.

Using a long, thin spatula, spread about a third of the cream cheese frosting to cover the whole cake with a crumb coat. The crumb coat is a very thin layer of frosting that you spread all around and on top of the cake to catch and seal in all of the crumbs. The idea is that if you catch and trap the crumbs in the first thin layer of frosting, they won’t transfer to the second and final layer of frosting.  I tend to cover the top of the cake first and finish with the sides. Refrigerate the cake for 20 minutes to harden the crumb coat, less if you’re confident with the spatula and won’t mix your first and second coats together. When ready, frost the cake with the rest of the cream cheese frosting.

Decorate as desired.  For my cake I piped some frosting onto the top of the cake using a pastry bag and a Wilton 2D tip. Apply pressure to the bag until the swirl reaches 1 1/2-inches, twist slightly and pull up. Repeat  this 9 times around the cake and top each swirl with a pink chocolate coated easter egg. I finished the cake off with some pink, Party Decoratifs by India Tree called “Pretty Bubbles” and some white Sprinkles by Wilton, purchased from Golda’s Kitchen. Other options for decorating include using shaved chocolate, crushed walnuts or chocolate ganache.

Keep the cake in the fridge. Let it stand at room temperature for about half an hour before serving.

Notes:

}} This cake has a delicious flavour and a really nice crumb/texture. Adjust the amount of food colouring depending on how light or dark you want the cake to be, adding less for a light shade and more for a darker shade. Usually, the way it appears in the bowl, is the way it will bake up in the pan.

}} The cheesecake recipe can be doubled for a thicker cheesecake centre.

}} This icing gets rave reviews from those who like icing that isn’t overly sweet or sugary.  If you eliminate the cream cheese, it’s also a top-notch, delicious icing for chocolate cake.

Read Full Post »