Feeds:
Posts
Comments

Archive for the ‘Dairy Delicious’ Category

1-1-DSC_1204

I love Christmas and all the baking and festivities that make the season so joyful. Every year I imagine all of the wonderful treats I’m going to whip up and regardless of the many baking books and clippings I already have stashed away, a new magazine of Christmas baking is always hard to resist.  This year wasn’t any different as I carried home a new, 100 Best Desserts, Special Edition of Best-Loved Recipes from Taste of Home for 2012.

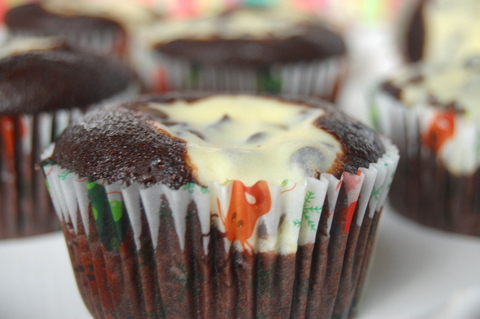
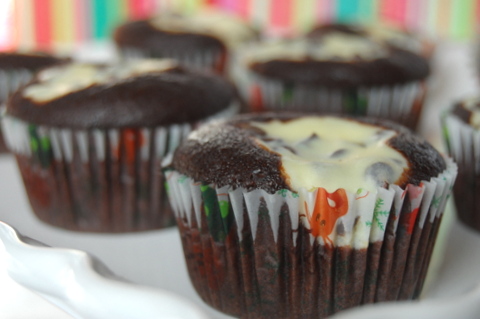
The funny thing is, that after poring over every single page, the very first recipe I opted to make were these decadent Black Bottom Cupcakes that I actually discovered a couple of years ago and simply cannot resist.

1-DSC_1191

The first time I discovered them, I was looking for something that my youngest son could take to school.  The idea of cupcakes that didn’t require icing was appealing, given that he and not me, would be transporting them. They turned out to be so easy and delicious that I’ve been making them for the holidays ever since.

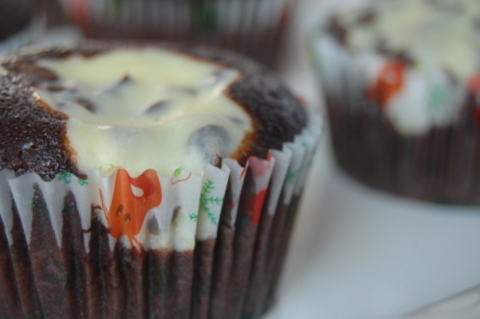
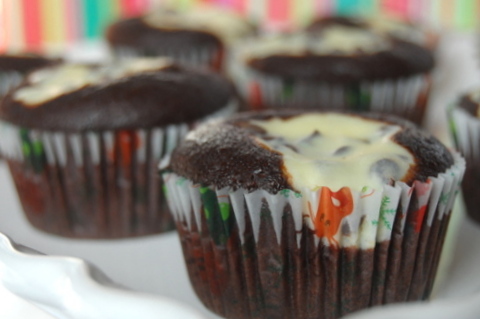
Chocolate and cream cheese are a delightful combination and these cupcakes are sure to fill any craving you may have during the holidays for a lush, moist, deep chocolate flavoured cupcake paired with a smooth, creamy cheesecake centre.

1-DSC_1204

The cupcake is made in two parts, first the creamy cheesecake centre followed by the chocolate cupcake batter. The liners are filled 1/3 full of chocolate batter followed by a generous dollop of cream cheese filling. Before adding the dollop of cream cheese filling, however, add a cup of mini chocolate chips to heighten the chocolate factor and add some extra dimension.

Still warm from the oven, the little bits of chocolate are silky and smooth against the rich cream cheese and the moist, almost gooey chocolate cake. I baked these up in some holiday liners I had on hand to give them a festive touch of Christmas holiday cheer. During the holidays, I’ve also been known to add an extra dollop of cherry pie filling on top of the cream cheese before baking, so that they’re almost like a piece of black forest cake when they come out of the oven.

Either way is equally delicious and always a hit with visitors and family alike.

Served up with a cold glass of milk, a mug of hot cocoa or packaged up with a bright red ribbon for a friend, these tasty cupcakes are a nice addition to the holidays or pretty much any day of the year.

Black Bottom Cupcakes

Cream Cheese Filling

1 package (8 ounces) cream cheese, softened

1 egg

1/3 cup sugar

1/8 teaspoon salt

1 cup semi-sweet mini chocolate chips

Chocolate Cupcakes

1 cup water

1/3 cup canola oil

1 tablespoon white vinegar

1 teaspoon vanilla extract

1 1/2 cups all-purpose flour

1 cup sugar

1/4 cup cocoa

1 teaspoon baking soda

1 teaspoon salt

Method

1. In a large bowl, beat the cream cheese, egg, sugar and salt until smooth.  Stir in chocolate chips; set aside.

2. For batter, in a large bowl, combine the water, oil, vinegar and vanilla.  Combine remaining ingredients; add to the liquid mixture and mix well (batter is on the thin side).

3. Fill liners 1/3  full with batter and top with a generous dollop of cream cheese filling.

4. Bake at 350 degree F for 16-18 minutes or until a toothpick inserted into the cupcake portion comes out clean.  Cool for 10 minutes before removing to  wire racks to cool completely.
1-DSC_1208

Read Full Post »

Have you ever “Googled” Homemade Waffles?

Everything you ever wanted to know about homemade waffles, and at least a million, homemade waffle recipes can be found there.

Between healthy-homemade, scratch, Belgian, buttermilk, buttery, delicious, blueberry, Grandma’s, Dad’s and Aunt Mae’s, it is entirely possible, that this may not be, the best homemade waffle recipe E-V-E-R.

The only thing I know for sure, is that it’s my recipe.  I took it from my 1979 Pillsbury Kitchen’s Family Cookbook, and I’ve used it ever since my boys were little and they would pitter, patter their way to the table in their bare little feet and pajamas. They rubbed their sleepy little eyes and we ate waffles until we were contentedly happy and full. And they were always good.

I can’t help but think homemade waffles are nostalgic.  I associate them with special occasions and late, lazy breakfasts.

Making waffles from scratch, means I’m filling the air with flour, cracking open eggs and messing up my baking bowls.

It means, I’m heating up my waffle iron, chopping fruit and getting my fingers sticky with maple syrup.

Waffles from scratch, mean I want you to grow up healthy, and strong and happy and able to go wherever your heart takes you.

Waffles from scratch, mean I love you.

Very, very much.

Homemade Waffles

Adapted from The Pillsbury Kitchen’s Family Cookbook

Serves 5

Ingredients

2 eggs, separated

2 cups buttermilk

2 cups all-purpose flour

2 teaspoons baking powder

1 teaspoon baking soda

1 teaspoon salt

1/2 cup butter, melted

Method

1. Heat up the waffle iron.

2.  Place egg yolks in a large bowl, and whites in a separate bowl.

3.  Add buttermilk to the egg yolks and beat well.

4.  Add flour, baking powder, soda and salt, beat until smooth.

5. Stir in the melted butter.

6. Beat egg whites until soft peaks form; fold into the batter.

7. Bake in hot waffle iron until steaming stops and waffle is a golden brown.

Notes:

I always spray my waffle iron with Pam or brush it with melted butter before adding the batter.

Be careful not to over-fill your waffle iron or the batter will spill over the edges.

It’s a good idea not to stray to far from the waffle iron to avoid scorching.

I always serve waffles with cut up fresh fruits like berries or banana’s for good nutrition.

Read Full Post »

Surprised?

I’ll bet you didn’t expect to hear from me this soon.

I’m making up for lost time.

If that’s even possible.

But I’m determined to try, so you can expect to hear a lot more from me this week as I try to fill these pages with some of the most delicious home baking and cooking recipes I’ve made while I was away.

Yes, even though I wasn’t here, I was still heating up the oven and cleaning up the mess.  Our plates were pretty and our tummies were full. Too full, sometimes.  Good food is hard to resist.  Like this blueberry apple cream cheese pie for instance.

It’s a pie I made a while back that I’ve been wanting to share.  It’s scrumptious. Apples and blueberries are covered in a luscious thick layer of cream cheese topping and  a sprinkle of walnuts.  It really is as good as it looks and it takes the humble pie to soaring heights of deliciousness.

Because I love to use fresh, seasonal fruit whenever I bake, Thanksgiving makes the perfect holiday to pass this around the family table, but you really can make and share it any time of the year and you’ll be sure to get some ooohh’s and awwwh’s.

Sprinkled with your favourite nuts, the rich and creamy, cream cheese topping nestles right into the tart apples and sweet blueberries for a beautiful, dramatic and rustic presentation that will impress even your most discerning of guests.

Cream Cheese Apple Blueberry Pie

Adapted from Pillsbury Kitchens’ Family Cookbook

Serves 10

Ingredients

Your favourite single-crust pastry

Apple Filling

6 cups (6 medium) peeled, sliced apples

1 cup fresh blueberries

1 cup brown sugar

1/3 cup all-purpose flour

2 teaspoons grated lemon zest

2 tablespoons lemon juice

Cream Cheese Topping

8-ounce package cream cheese, room temperature

1/3 cup granulated sugar

1 egg

1/3 cup chopped nuts (I used walnuts, but feel free to use your favourite)

Method

1. Heat oven to 375 degrees F.

2. In a large bowl, combine apples, blueberries, sugar, flour, lemon zest and lemon juice. Toss lightly.

3. Spoon into your prepared pastry-lined pie pan.

4. Combine all cream cheese topping ingredients except the nuts and beat until smooth.

5. Spoon cream cheese topping over the apples and blueberries.  Sprinkle with nuts. Bake at 375 degrees F for 30 to 35 minutes or until lightly browned.  Refrigerate any leftovers.

Note: There is a caramel sauce option for this pie that I didn’t try; but it does sound delicious so I’m adding it, just in case you’d like to give it a try.

For this caramel version, omit the blueberries, using just the apples, and make a caramel sauce that gets poured over the apples just before you add the cream cheese topping.

Caramel Sauce

8-ounces (about 28) of caramels

1/2 cup half-and-half or evaporated milk

In a small saucepan, melt caramels in half-and-half on low heat, stirring occasionally, until smooth.  While warm, drizzle over the apples before adding the cream cheese topping.


Read Full Post »

Older Posts »