Feeds:
Posts
Comments

Archive for December, 2011

No matter how you bake them, butter tarts are hailed as a true Canadian

favourite.  Dating back to the early 1900’s, butter tarts recipes have been

passed down from generation to generation and many family recipes have

debuted at county fairs all across this nation. Synonymous with tradition

and old-fashioned goodness, many recipes originate from our mothers or

grandmothers who thought nothing of throwing together a batch of pastry,

mixing some butter, sugar and dried fruit and turning out these sweet

confections by the dozen. They were filled with whatever happened to line

the pantry shelf that day and often included raisins, currants, walnuts,

chocolate, cranberries, coconut, pecans or any combination of these.

The perfect butter tart all comes down to preference  and Canadians have

definite opinions about whether the filling should be firm and custard-like

or gooey and runny when you bite into it. Over the holidays, I baked

up several recipes while looking for the perfect butter tart but was mostly

disappointed, until finally, I found it.  The most delicious butter tart

filling I found, was from a blog called Under the High Chair by Aimée from

Montreal, Canada. These are her mother’s tarts and the only one’s she eats. 

If you make them, you’ll be sure to see why.

 The filling for these tarts is a perfect combination of both a gooey filling and a

chewy texture. The filling bakes up to a perfect stickiness that’s delicious on

it’s own, or paired with dried fruits and nuts.  These tarts perfectly capture the

homemade taste of sweet Canadian baking and are a delight of buttery

goodness from start to finish.  First you’ll want to start with a pastry that gives

you a light, flaky crust.  This sour cream pastry is easy to handle, rolls out

nicely and bakes up flaky, golden and tender.  It’s a perfect butter tart dough.

Double-Crust Sour Cream Pastry

2 1/2 cups (625 ml) all-purpose flour

1/2 tsp (2 ml) salt

1/2 cup (125 ml) cold butter, cubed

1/2 cup (125 ml) cold lard, cubed

1/4 cup (50 ml) ice water (approx.)

3 tbsp (50 ml) sour cream


Method

1. In a large bowl, whisk flour with salt. Using a pastry blender, cut in the cold

butter and lard until it’s in fine pieces with just a few larger pieces.

2. Using a liquid measure, whisk water with sour cream.  Drizzle over the flour

mixture, tossing briskly with a fork and adding a little more water if necessary,

until a ragged dough forms.

3. Divide the dough in half; press it into 2 discs.  Wrap; refrigerate until chilled,

approximately 30 minutes.

Notes

The dough can be made ahead and refrigerated for up to 3 days or freeze in an

airtight container for up to 1 month. This is a double crust pie recipe that will

make enough for 18-24 butter tarts.

Recipe Source:  The Complete Canadian Living Baking Book

Butter Tart Filling  

1/3 cup (75 ml) butter, softened

1 cup (250 ml) brown sugar

2 eggs

1/2 cup (125 ml) corn syrup

2 tsp (10 ml) vanilla

1/4 cup (50 ml) raisins

1/4 cup (50 ml) chopped walnuts

1/2 cup (125 ml) coconut, toasted

1/2 tsp (2 ml) salt

2 tablespoons cream

Method

1. On a lightly floured surface, roll out pastry to generous 1/8-inch (3 mm)

thickness.

2. Using a 4-inch (10 cm) round cutter, cut out 12 circles, re-rolling any

scraps. Fit into muffin cups; refrigerate for 30 minutes.

3. Meanwhile, in a bowl, cream together butter and brown sugar until light.

Beat in eggs, corn syrup, and vanilla and mix well.  Mix in raisins, walnuts,

coconut, salt and cream.  Combine thoroughly. Divide evenly between the

pastry shells, approximately 1/4 cup (50 ml) into each shell.

4. Bake in the centre of a 350 °F (180 ° C) oven until filling is set and pastry is

golden, approximately 20 minutes.  Run a thin knife blade around the edges to

release the tarts.  Let cool in the muffin cups on a rack for 20 minutes before

transferring to a rack to cool. These tarts can be made ahead and stored in a

single layer in an airtight container at room temperature.

Makes 1 1/2 dozen 2-inch tarts.

Notes

Ease the rounds of pastry dough into the muffin cups and gently press them 

up against the sides of the cup with your fingertips. Without stretching the

pastry, fit the dough into the cup, working out as many of the folds as possible

for a circular tart shell or leave them wavy for a ruffled effect. 

Recipe Source:  Under the High Chair

Butter Tart Variations

Plain Butter Tarts:  omit the raisins, walnuts and toasted coconut.

Chocolate Butter Tarts:   add 3/4 cup ( 175 ml) semi-sweet chocolate

chips, omit raisins, and coconut.

Cranberry Coconut Butter Tarts:  add 3/4 cup ( 175 ml) cranberries,

omit  raisins and nuts.

Pecan Butter Tarts: add 3/4 cup ( 175 ml) chopped pecans, omit the

raisins, walnuts and toasted coconut.

There are, of course, the tried and trues, but the variations for these tarts are

endless. And, of course, that is what makes them so much fun ~ there’s

something for everyone!  I know I had my fair share.

Sshh!  That’s all I’m saying about that.

This Sweet Wife

Read Full Post »

Image

With Christmas just around the corner, I’ve got recipe ideas flying around my

head like freshly falling snow.  If only I had the time to make them all! Aahh,

that would be so very nice.  Over the next two weeks, I’ll make as many

interesting recipes as I can, that tie into the holidays and help us to bake and

cook up the delicious scents and aromas that we love about them. 

Image

I love this time of year and I love all of the desserts and sweets that go with it

  Image

These tartlets hold a medley of four different kinds of nuts and red chopped

glace cherries in a cookie-like shell.  Wrapped up in a honey caramel, the fruit

and nuts offer a taste and crunch that are a perfect match for each other. 

Drizzled with milk chocolate, these tartlets will add a delightful festive

appearance to your holiday table that will have your guests reaching for

more. Make and freeze these tartlets ahead of the holidays and you’ll have one

less thing to do once the festivities begin. Hhmmm, that sure sounds good!

  Image

Nutty Cherry Tartlets with Honey Caramel

Crust

1 1/2 cups (375 ml) all-purpose flour

1/2 cup (125 ml) icing sugar

1/3 cup (75 ml) cold butter, cut into cubes

 1 egg

1/4 tsp (1 ml) vanilla

Filling

1/2 cup (125 ml) each of pistachios, pecans, almonds and hazelnuts

1/2 cup (125 ml)  glace cherries

1/3 cup  (75 ml) clear honey

1/4 cup (50 ml) sugar

1/2 cup (125 ml) 35 % whipping cream

2 tbsp (25 ml) butter

1/2 cup milk or dark chocolate

Method

1. To make shells, coat three dozen mini-muffin cups with cooking spray or

lightly butter.  If you have non-stick pans, you can skip this step.  Whirl flour

with icing sugar and butter in food processor until butter is in tiny, barely

visible pieces. Add egg and vanilla; whirl until moist crumbs form.  Turn out

onto a piece of plastic wrap or waxed paper and form into a solid disc of

dough.  For ease in rolling, divide dough in half  and roll between two sheets of

waxed paper or parchment. Roll out each half until slightly thinner than

normal pie dough.  Cut with a 2 1/2 -inch (6-cm) cutter; line cups, extending

the dough slightly above the cup edge.  Use scraps to repair any breaks or fill

in thin spots.  Freeze while making the filling or for at least 10 minutes.

Note:  You could certainly use your own favourite pastry recipe for the shell

instead of following the one here. 

2.  Spread the nuts onto a baking pan and toast in a 400 °F (200 °C) oven for 6

minutes or until lightly browned.  Use a tea towel to rub papery skins from the

hazelnuts.  Coarsely chop nuts and cherries.  Stir together; set aside.

3.  To make the honey caramel, combine the honey and sugar in a medium

heavy-bottomed saucepan.  Without stirring, bring it to a boil over medium

heat.  Meanwhile, in a measuring cup in the microwave, heat the cream and

butter together for 45 to 60 seconds or until very hot, but not boiling. 

Continue boiling sugar mixture until it has turned a deep caramel colour. 

Remove the pan from the heat.  Avert your face while slowly pouring in the

cream mixture (because it will really bubble up); stir.  Reduce heat to low and

return pan to stove.  Gently boil, stirring occasionally, for 3 minutes.  Stir in

nuts and cherries; remove from heat and set aside.

4. Remove tart shells from freezer; immediately place in preheated oven. 

Bake until pastry is golden, about 8 minutes (for a dark pan) or 10 minutes (for

a light pan). Cool; then generously fill with caramel nut mixture. 

5. Drizzle with melted milk or dark chocolate. For this small amount you can

easily melt the chocolate in the microwave in a microwave safe dish for 30

seconds, remove & stir until completely melted. Drizzle back & forth with a

spoon across the tarts.

Covered, these tartlets keep well at room temperature for up to 2 days; or

freeze in an airtight container for up to 2 weeks.  Makes 3 dozen tartlets. 

Thanks for the company, and good luck with all your Christmas baking!

This Sweet Wife

Read Full Post »

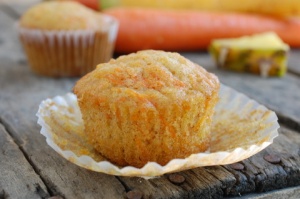
With the holidays fast approaching, Christmas morning recipe ideas are at the top of my to-do list.  Lots of folks will be busy opening gifts and sharing time with their families and no one wants to be stored away in the kitchen and miss out on all the fun.  So, while many a strata will be made on December 24th, here’s another idea that will bring a festive dimension to your holiday breakfast that can be made ahead.  Orange, Cranberry, Carrot Cake Muffins.

When it comes to muffins, I’m pretty fussy.  I like them moist, with nutritious ingredients, full of flavour and not too sweet.  A muffin should not be a cupcake.  I don’t think muffins need a lot of sweet, sticky toppings; I think the muffin should be good enough that it can stand alone. I like muffins that work for breakfast, can be packed with a lunch, are great  grab n’ go’s, and fill the void between after school and supper. This muffin really fits the bill.  But it also brings a dimension of satisfying holiday flavours in the orange, the cranberries, the carrots, the nuts, coconut and spices that your family and guests will really love. 

These muffins do not have an oily taste, they’re light and very moist from  the use of the whole orange.  The fruit and nuts add texture, flavour and good nutrition. Whip up a batch of these muffins over the holidays; prepared ahead,they’ll keep you out of the kitchen and free to enjoy the spirit of Christmas.


Cranberry Orange Carrot Cake Muffins

Ingredients

1 seedless navel orange, quartered, rind included

2/3 cup (150 ml) orange juice (approx.)

2 eggs

3/4 cup (175 ml) packed brown sugar

1/3 cup ( 75 ml) canola oil

2 tsp (10 ml) vanilla

1 3/4 cups (425 ml) all-purpose flour

1 tsp (10 ml) cinnamon

1 tsp. (5 ml) baking powder

1 tsp. (5 ml) baking solda

1/2 tsp (2 ml) each ground nutmeg and salt

2 cups (500 ml) grated carrots

1/2 cup (125 ml) each dried cranberries and chopped toasted pecans

1/2 cup (125 ml) shredded coconut

Method

1. Line 12 muffin cups with paper liners or grease and set aside. 2. In food processor, finely chop the orange.  My food processor didn’t chop the orange fine enough for me so I ended up using my hand-held blender.  I really ground up the orange to a fine pulp until it was foamy and resembled jam. How much you grind up the orange is really a personal preference.  You may like to leave little fine pieces of orange or you can grind it to a foaming pulp like I did.  The skin of the orange can be quite strong so if you like a milder orange taste, grind it up well.

2. Scrape the orange into a liquid measuring cup; add enough orange juice to make 1 1/3 cups (325 ml).  Scrape into a bowl and whisk in eggs, sugar, oil and vanilla until well mixed.

3. In a large bowl, whisk together flour, cinnamon, baking powder, baking soda, nutmeg, salt; scrape orange mixture over the top. Add carrots, cranberries, chopped pecans and 1/2 cup (125 ml)  of the coconut; stir just until the dry ingredients are moistened.  Spoon into prepared muffin cups,  approximately 3/4 full and evenly distributed (I personally have trouble with this part; too much in some, not enough in another — whatever; don’t fuss, it always works out in the end).

4. Bake in the centre of a 350 °F (180 °C) oven until tops are firm to the touch, about 25 minutes.  Let cool on the rack for 5 minutes.  Remove from the pan and let cool on the rack. (If you decide to make these ahead; store in an airtight container for up to 24 hours or wrap individually in plastic wrap and freeze in an airtight container for up to 1 month.)

Adapted from Canadian Living Holiday Baking, Fall 2004

Happy Baking ~ I hope you stop by again real soon! 

Love,

This Sweet Wife

Read Full Post »

Older Posts »