Feeds:
Posts
Comments

Archive for February, 2012

Calling all mushroom lovers. Ovvvv–er here!


One of the things I absolutely love to eat are appetizers.  They’re so cute and so flavourful and of course, so little, that you have to have more than just one, or even two and well, dog-gone-it, sometimes 3 or 4.  Well the great thing about these little appetizers, is that they are almost all vegetables, so I’m giving you permission to have as many as you like and there’s absolutely no guilt involved.  None. Eat as many as your little heart desires.

The thing I like about this combination of flavours is its freshness.  It doesn’t leave a heavy aftertaste, nor does it make you feel like you’ve over-indulged.  It delivers a light, flavourful mouthful with every bite that will have your family and friends coming back for more. Served at a party, as an appetizer, these yummy little morsels are sure to get polished off.

Italian Stuffed Mushrooms

4 strips bacon, diced

1/4 cup (50 ml) ground pork

30 – 40 medium to large fresh mushrooms

1 cup (250 ml) onion and garlic salad croutons, crushed

1 cup (4 ounces) shredded part-skim mozzarella cheese

1 medium tomato, finely chopped

1/2 yellow pepper, finely diced

1/4 cup  (50 ml) grated Parmesan cheese

2 tablespoons (25 ml) minced fresh parsley

1-1/2 teaspoons (6 ml) minced fresh oregano or 1/2 teaspoon dried oregano

Method

1. In a large skillet, cook pork, drain fat and pat with a paper towel.  Chop finely with a knife or a hand-held blender and set aside. In the same skillet, cook bacon over medium heat, until crisp.  Remove to paper towels; pat dry, reserving 1 tablespoon of drippings.


2. Remove stems from mushrooms; set caps aside. Finely chop half of the stems (save the remaining for another use).  Add chopped stems to bacon drippings; saute for 2-3 minutes.  Remove from the heat. 

3. Mix mushroom stems with crushed croutons, cheeses, tomato, pepper, cooked ham, bacon, parsley and oregano.

4. Firmly stuff crouton mixture into mushroom caps. Place on a greased baking sheet.  Bake at 425 °F for 12-15 minutes or until mushrooms are tender.

Adapted from Taste of Home Magazine 2011

Notes

I filled a combination of 40 medium to large mushrooms and still ended up with enough filling left over for a great lunch idea which I’ll be posting here later in the week. In the meantime, here’s a handy little tip I found over at Farm Boy to keep mushrooms fresh.

What’s the best way to keep Mushrooms fresh?
Once you’ve purchased mushrooms loose or in a package, keep them in a paper bag to ensure freshness. This allows the mushrooms to breathe better and stay fresher longer so they retain their firm, tasty shape. Do not store them in plastic bags since plastics non-porous nature causes faster deterioration and loss of flavour while cooking. Stored properly, mushrooms should keep for several days. It doesn’t matter what size of mushrooms you pick. Size isn’t a sign of quality or age. Large ones are great for stuffing and smaller ones for marinating. Medium mushrooms are perfect for anything.


Read Full Post »


A couple of weeks ago, on February 9th, Paula, of Vanilla Bean Baker, who is

an ultra talented baker, introduced 16 year old Angelyn, of Everyday

Desserts.  Angelyn bakes some seriously decadent cookies, brownies and

treats that are highly addictive and almost always contain chocolate in some

form or another.  I can’t wait  to try a TON of her recipes. 

As a guest blogger for Paula, Angelyn’s post was an awesome Deep Dish Milky

Way Cookie that she’d baked up in a “Whoopie pie pan”.  These cookies looked

so good that I decided right then and there that I wanted to give them a try. 

I immediately rang my husband and asked him would he pret-ty, pret-ty 

please pick me up some “Milky Ways”, if I promised to bake him something

pret-ty special and delicious.  What I didn’t know, is that Milky Way chocolate

bars aren’t sold in Canada, and so I was presented with a package of Snickers

chocolate bars and a package of Mars chocolate bars instead.  I could have my

pick. No problem ~ either would work perfectly.  I decided to go with the

Snickers because the thought of peanuts AND caramel AND cookie dough

sounded like something I’d dreamed of. 

Unfortunately this brought me to my next problem, which was that I didn’t

have a whoopie pie pan. I’m smart enough to know, no amount of pret-ty

pleasing was going to get me a whoopie pan, and since I’d rather stay home

than go out, I decided to be resourceful, and pulled out my 9″x9″ pan and

made bars instead.

Yum. Yum. Yum. 

Look, you can see the Snickers chocolate bar right there

surrounded by all that yummy cookie dough.

I made some tea and we ate some bars and it was … JOY-ful.

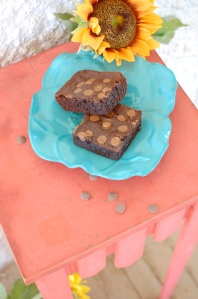
  Served warm, these are rich, chewy and delicious. 

In fact, I like them best, served warm, it brings out the chewiness.  

Even though it may look like it, we didn’t actually eat outside.  Unfortunately,

it’ll be at least a month before spring arrives, though it does feel like it’s close

by at times. The sun wasn’t coming in the window when I tried to take these

pictures so I decided to take the party outside.  The good news, is that as of

yesterday, I now have a whoopie pan and can’t wait to make these bars

again.  Whoop–ie!!

Deep Dish Snickers Bars

1 cup butter (250 ml), room temperature

1 cup (250 ml) dark brown sugar

1/2 cup (125 ml) granulated sugar

2 eggs

2 tsp (5 ml)vanilla

1 tsp (5 ml) baking soda

1 1/2 tsp (7 ml) baking soda

1 1/2 tsp (7 ml) coarse sea salt

2 1/2 cups ( 625 ml) all purpose flour

4 Snickers chocolate bars, chopped

Method

1. Preheat oven to 350 ° F (180 ° C).  Prepare a 9″ x 9″ pan by first spraying it with cooking spray.

2. Mix flour, baking soda and sea salt and set aside.

3. Cream butter and sugars together in electric mixer with paddle attachment on medium speed until really creamy (approximately 5 minutes). Turn speed to low and add eggs, one at a time until completely mixed.  Add vanilla and mix. With mixer on low, add flour, baking soda and sea salt. When just mixed, fold in chopped Snickers bars.

4. Press batter into prepared pan and bake for 22-25 minutes until the edges are golden and the center is JUST set.  Remove from the oven and let cook in pan. When cool, turn out onto a cutting board. Cut into bars and serve.

Makes 1 dozen large bars or 2 dozen medium bars

Read Full Post »


I’ve discovered that I’m hardwired to bake.  It’s what I think about when I

wake up in the morning and what I think about when I’m driving, when I’m

at the grocery store, or in the dentists’ chair. It’s what I think about when

I’m in a crowd or all alone.  It’s what I yearn for when I have other chores

to do, what I stay up late for and what I dream about. It’s how I mend a

wounded heart, comfort a worn out soul, plan a big event, show off a new

idea, serve up my sincere gratitude, or share my heartfelt love.  Quite

simply, it’s what makes me happy. And I know it makes a lot of you happy too.

Seeing as today is a day for declaring our love for the people and things we

love, I took this opportunity to write my true love a very special Valentine.


For a long time I searched for “my calling”.  Something I was good at.

Though I tried on many hats, nothing seemed to be a good fit. Until, quite

unexpectedly, I discovered I was good at something I already did.  It’s funny

how you can miss something so entirely, while you’re incredibly busy looking

for it.  Has anything like that ever happened to you?

I baked these cupcakes for Jennie, my son’s special valentine, on the

occasion of her 21st birthday.  The  vanilla buttercream recipe is the same

one I always use, and the one I wrote about earlier in the week, in the

post Strawberry Heart Cupcakes. It tastes delicious on any flavour of cupcake.

I hope you’re enjoying the valentines in your life, today … and every day.

Love, Jackie  XXOO

Read Full Post »

Older Posts »