Feeds:
Posts
Comments

Archive for July, 2012

If you buy bananas, you’ll know that every once in awhile, some will start to start to grow spots and the next thing you know, you need to whip up a batch of something with banana in it.

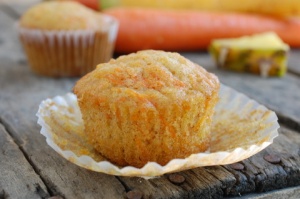
A while back Jenn, from My Kitchen Addiction, posted a recipe for Chocolate Chip Toffee Banana Muffins. They looked delicious and I loved the idea of making them mini-snack-sized. They baked up fluffy and delicious, and just like she said, they made a lot. I stored most of them in a container in the freezer and took some out every so often as I needed them. It was perfect for those busy days when there wasn’t any time to bake, so I thought I’d share the recipe with you here.

I have to warn you though, they are addictive and pop ever-so easily into your mouth as you walk by.

I hope you enjoy them!

Chocolate Chip Toffee Banana Muffins

Makes about 3 1/2 dozen muffins

Adapted ever so slightly from My Kitchen Addiction

  • 1 cup (2 sticks) unsalted butter, softened
  • 1 cup granulated sugar
  • 1/2 cup lightly packed brown sugar
  • 4 eggs
  • 2 cups mashed banana
  • 3 cups whole wheat flour
  • 1 cup whole wheat pastry flour
  • 2 teaspoons baking soda
  • 1 teaspoon salt
  • 2/3 cup hot water
  • 1 cup mini chocolate chips
  • 1 cup toffee bits, (optional)

Method

1. Preheat the oven to 350°F. Line muffin pans with paper cups (or lightly grease), and set aside.

2. Combine the softened butter, sugar, and brown sugar in a large mixing bowl.  Beat on medium speed to cream the butter and sugars until the mixture is light and fluffy.  Gradually add the eggs one at a time, beating after each addition until well incorporated.  Stir in the mashed banana.

3. Meanwhile, in a separate mixing bowl, whisk together the white whole wheat flour, whole wheat pastry flour, baking soda, and salt.  Gradually add the dry ingredients to the creamed mixture alternately with the hot water, starting and ending with the dry mixture.  Stir just enough to moisten all of the dry ingredients.

4. Add the mini chocolate chips and toffee bits, and fold them into the batter.  Spoon the batter into the prepared muffin pans (approximately 1/4 cup of batter for each muffin).  Bake the muffins for approximately 20 – 22 minutes.  Let the muffins cool in the pan for 10 minutes before transferring to a wire rack to cool completely.

Notes:

If you can’t find whole wheat pastry flour, you can make it, by using regular whole wheat flour, removing 2 tablespoons per cup and replacing it with 2 tablespoons of cornstarch and whisking thoroughly.

Read Full Post »

In June I had all kinds of gorgeous, berry delicious recipes picked out to make while strawberries were in season, sadly though life was hectic and I never made it to our local patch this year.

Strawberry picking is a tradition in our family that I’ve always looked forward to. The best part of being in the patch is popping that very first plump, juicy berry into your mouth and tasting that off-the-vine freshness that comes with picking your own. It sure motivates you to get picking and fill that basket so you can bring more of that berry goodness home with you.

Recipes abound for these ruby-red beauties and the possibilities they bring to the table are endless.  One of the ways I’ve been eating them since the spring is in a goat cheese and spinach salad that I truly love.

For this salad, one of the things I really concentrated on, was the dressing. I wanted to come up with something that was light, summer-y, full of good-for-you ingredients and the most important thing – great berry flavour.  Nothing artificial. I wanted to compliment the spinach and goat cheese with a berry-bursting freshness — the same freshness found in berry patches across Ontario.

Each year, I usually make strawberry jam as a way of capturing and enjoying those delicious berries all year-long. One of the jams I make is a no-cook strawberry freezer jam which is basically a mixture of freshly crushed berries, sugar, pectin and lemon juice.  The jam is not cooked but poured directly into jars and kept in the freezer until I need it. Because it doesn’t go through a long cooking process, the jam is bright red, sweet and full of delicious berry flavour.

I had some in the freezer that hadn’t set all that well, so I’d been saving it to serve as a topping over ice cream. Then I thought, what better way to bring that berry-freshness to the dressing than to use my runny strawberry freezer jam. It would work perfectly as a base for a salad dressing.

I added a little olive oil to thin it out, apple cider vinegar and freshly squeezed lemon juice for a little flavour contrast, and some poppy seeds for crunch.  This is now one of our all-time favourite dressings and it has everyone helping themselves to seconds of vitamin-packed spinach and strawberries. It takes just a couple of minutes to put together, and brings one of the freshest tasting dressings right to your table, so you can enjoy summer all year-long.

Strawberry Spinach Salad

Serves 6

6 cups spinach, washed

2 cups fresh strawberries, quartered

4 – 5 ounces goat cheese

1/2 cup almonds, roughly chopped

Method

1. Wash and dry spinach leaves and remove longs stems if necessary.  Place in a large bowl and set aside.

2. Wash strawberries, remove stems and cut into quarters. Place berries on top of spinach.

3. Crumble goat cheese into bite-size chunks and place on top of berries and spinach followed by the almonds.

4.  Make the dressing.

Perfect Summer Preserve Strawberry Dressing

1/2 cup strawberry freezer jam

1/8 cup olive oil

1 tablespoon freshly squeezed lemon juice

1/2 tablespoon apple cider vinegar

1 teaspoon poppy seeds

Method

1. Mix all the ingredients together in a bowl and stir with a whisk for 30 seconds until incorporated or place all the ingredients in a mason jar fitted with a lid and shake for 15 seconds.

Pour over your salad and enjoy!

Any left over dressing can be kept in the refrigerator for up to 4 weeks.

If you don’t have strawberry freezer jam, you can easily substitute any favourite strawberry preserves.

Read Full Post »

There’s a lot of rhubarb grown on farms in the country.  Just about everyone has a patch somewhere out in the yard and everyone looks forward to the beautiful green and red shoots that can be baked up into the most delicious pies, tarts, jams, cakes, squares and even punch. Yes, punch.  My sister-in-law has been making a rhubarb punch for as long as I’ve known her, It comes from straining cooked rhubarb and serving it mixed with sugar and ginger ale.  It’s positively delicious; a little tart, a little sweet and I always look forward to having some when we visit.

This recipe though, isn’t for rhubarb punch, it’s for Rhubarb Sponge Pudding which is a delightful way to make use of some of that rhubarb that may be growing in your garden.

Unfortunately my rhubarb never survives the winters and I’ve all but given up hope of ever having my own patch.  Thankfully the neighbours are generous and share plenty of their’s with me.  This is some that I’ve had in the freezer from last year’s season so I wanted to get it used up.

This recipe sounded like the perfect way to use it and one I’m sure I’ll use again and again.

The moist sponge topping is light, yet full of flavour and it really compliments the tender fruit underneath. I sweetened mine with pure maple syrup, popped a few raspberries into each ramekin and it was a delightful combination of some of my favourite flavours.

Perfect with vanilla ice cream. (Unfortunately those pictures have seemingly disappeared).

This can be made as a single desert in a 9×9-inch baking pan or in 6 individual ramekins.  Either is perfect for sharing and can be made well ahead of any entertaining you may be doing as it keeps well for days in the refrigerator.

Rhubarb Sponge Pudding

1 pound (about 3 cups) rhubarb, cut into 1-inch pieces

1/2 cup golden corn syrup or pure maple syrup

1 tablespoon brown sugar

1/2 cup granulated sugar

2 eggs, beaten

3/4 cup all-purpose flour

1 teaspoon baking powder

pinch salt

Method

1. Preheat oven to 375 degrees F.

2. Place rhubarb in lightly buttered 9×9-inch pan or 6 ramekins. Drizzle with the syrup and brown sugar.

3. Beat butter and sugar together in a bowl until light and fluffy.  Beat in eggs.

4. Mix together dry ingredients and gently fold into the batter. Spread on top of the rhubarb.

5. Bake for 30 to 35 minutes or until a toothpick comes out clean.  Serve while still warm with custard or ice cream.

Optional:  Add in 1 cup of your favourite berries (strawberries or raspberries work best) to the 9×9-inch pan or 3-4 berries per ramekin.

Serves 6

Adapted from Lucy Waverman, The Globe and Mail

Read Full Post »

Older Posts »