Feeds:
Posts
Comments

1-DSC_1236

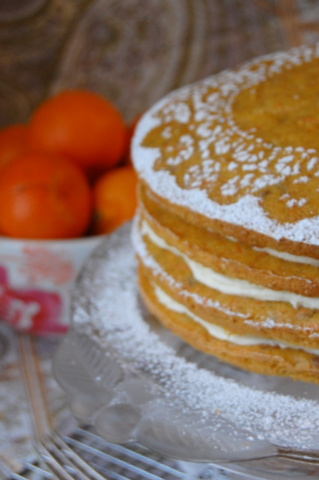
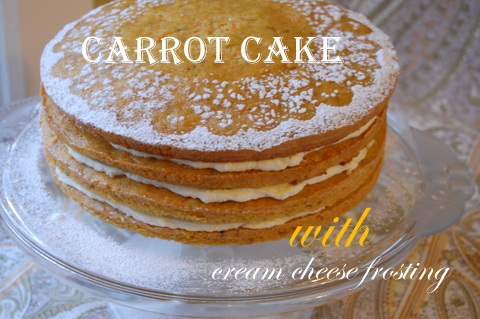
Happy Christmas everyone! I hope your holiday has been, and will continue to be filled with love, joy, family, friends and endless layers of sweetness like this fluffy carrot cake.

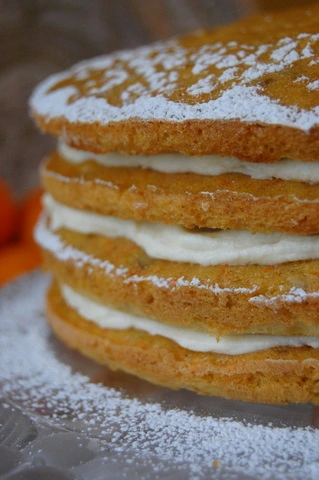
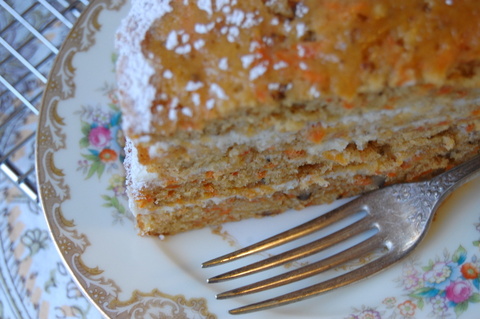
Carrot cake isn’t necessarily a conventional Christmas dessert, not like a steamed pudding or trifle anyway, but it does make a nice addition to the holiday feasting because it incorporates a lot of the foods we associate with the holidays.  The delicate layers of cake are full of sugar, spices, nuts, fruit and shredded carrots layered between thick, creamy cream cheese frosting for a smooth and satisfying finish to any holiday meal. It’s not overly sweet and can be a welcome change to some of the sweeter desserts being whipped up right now.

1-DSC_1291

Though I usually wrap the whole cake in frosting, this time I wanted to cut back on the richness a little and thought I’d just layer the cake with frosting and top it off with a sprinkle of powdered sugar.  I placed a doilie upside down on top of the cake and sprinkled powdered sugar with a little sifter around the edges until the holes in the doilie were covered.  The result was a pretty outline of the doilie to decorate the cake, without the heaviness of a lot of cream cheese frosting. My family was delighted with the results as they raved about the rich and satisfying taste of the cake without some of the extra calories that usually come with a lot of frosting.

1-DSC_1299

Wrapped entirely in frosting or filled just between the layers, this carrot cake is a delicious way to entertain family or friends during the holiday season because the ingredients can be adjusted to suit your preferences by changing golden raisins for dried currants, shredded coconut (my personal favorite) or pineapple chunks.

My sincere best wishes for a wonderful year of sweetness and joy!

1-DSC_1301

Carrot Cake with Cream Cheese Frosting

Adapted from Vintage Cakes by Julie Richardson

Ingredients

1 cup all-purpose flour

1 cup whole wheat flour

1 1/2 teaspoons baking powder

1/2 teaspoon baking soda

1/2 teaspoon fine sea salt

1 teaspoon cinnamon

1 teaspoon ground ginger

1/4 teaspoon ground nutmeg

11/2 cups granulated sugar

1/2 cup firmly packed brown sugar

3/4 cup canola oil

4 eggs, at room temperature

1/2 cup buttermilk, at room temperature

1 pound peeled and coarsely grated carrots (approximately 3 cups)

1/2 cup chopped walnuts, untoasted

1/2 cup golden raisins

Method

1. Center an oven rack and preheat the oven to 350 degrees F.

2. Sift together the flours, baking powder, soda, salt, ginger, cinnamon, and nutmeg in a bowl, then whisk the mixture by hand to ensure that the ingredients are well mixed.

3. In the bowl of a stand mixer fitted with the paddle attachment, combine the sugars with the oil on low-speed until the mixture resembles wet sand. As you make the batter, stop the mixer frequently and scrape the paddle and the sides of the bowl with a rubber spatula. Add the eggs one at a time, adding the next one as soon as the previous one has disappeared into the batter. Increase the speed to medium-high and blend for 3 minutes.  The thick batter will increase in volume and lighten in color. With the mixer on low-speed, add the flour mixture in three parts, alternating with the buttermilk in two parts, beginning and ending with the flour. After each addition, mix until just barely blended and stop and scrape the bowl.  Stop the mixer before the last of the flour has been incorporated and complete the blending by hand with a rubber spatula to ensure you do not over-beat the batter. Fold in the carrots, golden raisins and the walnuts.

4. Divide the batter evenly between four prepared pans.  Place the pans in the center of the oven and bake until the cakes are golden and spring back when lightly touched in the middle, 20 to 25 minutes.

5. Promptly run a knife around the edge of the pan to help the cake retract evenly from the sides while cooling. Cool the cakes in their pans for 10-12 minutes, taking extra care as they are fragile and could crack. Leave them to cool on the rack, top side up, until they reach room temperature and you are ready to assemble the cake.

6. To assemble the cake, place one of the layers, top side up, on a serving plate. If the cake is domed in the middle you may need to use a serrated knife to trim off the domed area.  Using a metal spatula, spread one-third of the frosting over the cake, spreading it slightly to the edge. Place the next layer of cake, top side down, on top of the frosted layer, remembering to trim any excessive doming first, if necessary.  Repeat again, ending with the last layer placed top side up on the frosting. Place a doilie upside down on top the cake and press it down until it sticks slightly. Fill a small sifter with a tablespoon of powdered sugar, taping it gently with your hand over the edges of the doilie until you have gone all the way around.  Carefully remove the doilie by lifting it gently up and away from the cake and you should have a lovely decorative pattern that will last for several hours.  If left overnight the powdered sugar will be absorbed into the cake so if you are entertaining, it may be best to leave this part until just before your guests arrive.

Notes:

This cake is fabulous the day it’s made but can be kept fresh for up to 2 days in an airtight container in the refrigerator due to the frosting.  Allow at least 1 hour for the cake to come to room temperature before serving. I’ve also frozen this cake with great results. Just let it defrost at room temperature and serve.

Cream Cheese Frosting

Adapted from Food Network Website
Ingredients
8 oz. unsalted butter, softened (I used salted butter and it was just as good)
8 oz. cream cheese, softened
4 cups powdered sugar (confectioner’s)
2 teaspoon vanilla extract
Method
1. In a large bowl, beat together the butter and cream cheese with an electric mixer.  With the mixer on low-speed, add the powdered sugar a cup at a time until smooth and creamy.  Beat in the vanilla extract.

Black Bottom Cupcakes

1-1-DSC_1204

I love Christmas and all the baking and festivities that make the season so joyful. Every year I imagine all of the wonderful treats I’m going to whip up and regardless of the many baking books and clippings I already have stashed away, a new magazine of Christmas baking is always hard to resist.  This year wasn’t any different as I carried home a new, 100 Best Desserts, Special Edition of Best-Loved Recipes from Taste of Home for 2012.

The funny thing is, that after poring over every single page, the very first recipe I opted to make were these decadent Black Bottom Cupcakes that I actually discovered a couple of years ago and simply cannot resist.

1-DSC_1191

The first time I discovered them, I was looking for something that my youngest son could take to school.  The idea of cupcakes that didn’t require icing was appealing, given that he and not me, would be transporting them. They turned out to be so easy and delicious that I’ve been making them for the holidays ever since.

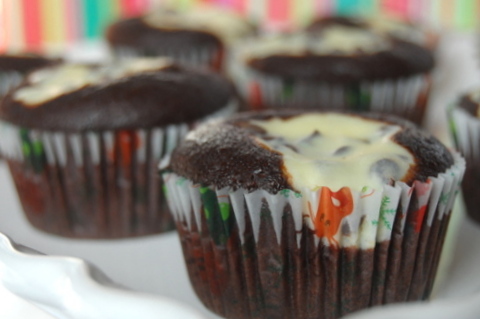
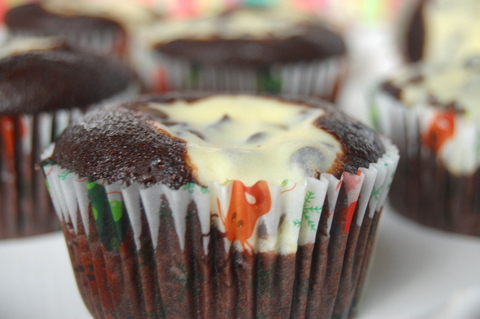
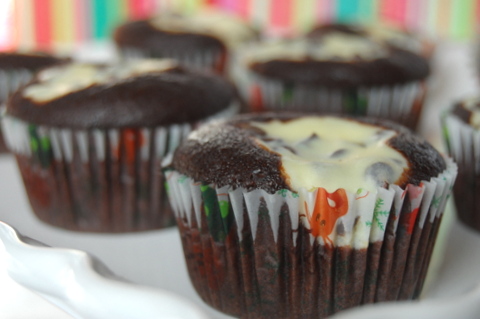
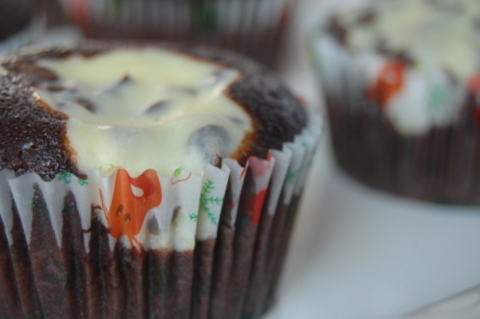
Chocolate and cream cheese are a delightful combination and these cupcakes are sure to fill any craving you may have during the holidays for a lush, moist, deep chocolate flavoured cupcake paired with a smooth, creamy cheesecake centre.

1-DSC_1204

The cupcake is made in two parts, first the creamy cheesecake centre followed by the chocolate cupcake batter. The liners are filled 1/3 full of chocolate batter followed by a generous dollop of cream cheese filling. Before adding the dollop of cream cheese filling, however, add a cup of mini chocolate chips to heighten the chocolate factor and add some extra dimension.

Still warm from the oven, the little bits of chocolate are silky and smooth against the rich cream cheese and the moist, almost gooey chocolate cake. I baked these up in some holiday liners I had on hand to give them a festive touch of Christmas holiday cheer. During the holidays, I’ve also been known to add an extra dollop of cherry pie filling on top of the cream cheese before baking, so that they’re almost like a piece of black forest cake when they come out of the oven.

Either way is equally delicious and always a hit with visitors and family alike.

Served up with a cold glass of milk, a mug of hot cocoa or packaged up with a bright red ribbon for a friend, these tasty cupcakes are a nice addition to the holidays or pretty much any day of the year.

Black Bottom Cupcakes

Cream Cheese Filling

1 package (8 ounces) cream cheese, softened

1 egg

1/3 cup sugar

1/8 teaspoon salt

1 cup semi-sweet mini chocolate chips

Chocolate Cupcakes

1 cup water

1/3 cup canola oil

1 tablespoon white vinegar

1 teaspoon vanilla extract

1 1/2 cups all-purpose flour

1 cup sugar

1/4 cup cocoa

1 teaspoon baking soda

1 teaspoon salt

Method

1. In a large bowl, beat the cream cheese, egg, sugar and salt until smooth.  Stir in chocolate chips; set aside.

2. For batter, in a large bowl, combine the water, oil, vinegar and vanilla.  Combine remaining ingredients; add to the liquid mixture and mix well (batter is on the thin side).

3. Fill liners 1/3  full with batter and top with a generous dollop of cream cheese filling.

4. Bake at 350 degree F for 16-18 minutes or until a toothpick inserted into the cupcake portion comes out clean.  Cool for 10 minutes before removing to  wire racks to cool completely.

1-DSC_1208

Homemade Waffles

Have you ever “Googled” Homemade Waffles?

Everything you ever wanted to know about homemade waffles, and at least a million, homemade waffle recipes can be found there.

Between healthy-homemade, scratch, Belgian, buttermilk, buttery, delicious, blueberry, Grandma’s, Dad’s and Aunt Mae’s, it is entirely possible, that this may not be, the best homemade waffle recipe E-V-E-R.

The only thing I know for sure, is that it’s my recipe.  I took it from my 1979 Pillsbury Kitchen’s Family Cookbook, and I’ve used it ever since my boys were little and they would pitter, patter their way to the table in their bare little feet and pajamas. They rubbed their sleepy little eyes and we ate waffles until we were contentedly happy and full. And they were always good.

I can’t help but think homemade waffles are nostalgic.  I associate them with special occasions and late, lazy breakfasts.

Making waffles from scratch, means I’m filling the air with flour, cracking open eggs and messing up my baking bowls.

It means, I’m heating up my waffle iron, chopping fruit and getting my fingers sticky with maple syrup.

Waffles from scratch, mean I want you to grow up healthy, and strong and happy and able to go wherever your heart takes you.

Waffles from scratch, mean I love you.

Very, very much.

Homemade Waffles

Adapted from The Pillsbury Kitchen’s Family Cookbook

Serves 5

Ingredients

2 eggs, separated

2 cups buttermilk

2 cups all-purpose flour

2 teaspoons baking powder

1 teaspoon baking soda

1 teaspoon salt

1/2 cup butter, melted

Method

1. Heat up the waffle iron.

2.  Place egg yolks in a large bowl, and whites in a separate bowl.

3.  Add buttermilk to the egg yolks and beat well.

4.  Add flour, baking powder, soda and salt, beat until smooth.

5. Stir in the melted butter.

6. Beat egg whites until soft peaks form; fold into the batter.

7. Bake in hot waffle iron until steaming stops and waffle is a golden brown.

Notes:

I always spray my waffle iron with Pam or brush it with melted butter before adding the batter.

Be careful not to over-fill your waffle iron or the batter will spill over the edges.

It’s a good idea not to stray to far from the waffle iron to avoid scorching.

I always serve waffles with cut up fresh fruits like berries or banana’s for good nutrition.