Feeds:
Posts
Comments

Archive for November 16th, 2011

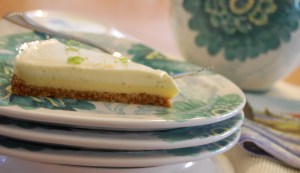
Just like hay and sunshine, lemons and limes are just meant to go together. Singularly they’re very good, but together they’re intense. A combination of  lemons and limes makes the most glorious, tart, refreshing flavour explosion I can think of.  This recipe takes these glorious flavours and turns them into a luscious, creamy, beautiful and luxurious dessert.  The combination of the graham cracker, coconut crust is warm and delicious, the layer of lemon is sweet and heavenly, the topping of fresh lime is rich and creamy.  All 3 of  these layers combine to provide an absolutely luscious dessert that will impress your most discerning of guests.   

Lemon Lime Tart

1/2 cup (125 ml) lemon juice, strained

3 eggs

1 can (300 ml) sweetened condensed milk

1 tsp (5 ml) vanilla

2 limes

8 oz. (227 g) cream cheese, softened

2 tablespoons (30 ml) granulated sugar

Coconut Graham Crust

1 cup (250 ml) graham cracker crumbs

1/2 cup (125 ml) unsweetened desiccated coconut

3 tablespoons (45 ml) unsalted butter, softened

2 tablespoons (30 ml) sugar

1 pinch salt

1. In a large bowl and using fingertips, crumble graham cracker crumbs, coconut, butter, sugar and salt.  Press into parchment-paper-lined 9-inch   springform pan.

2. Bake in 350 °F ( 180 °C) oven until golden brown, 10-12 minutes. Let cool completely. This can be made ahead and stored, covered in the refrigerator for up to 48 hours.

Lemon Filling

While your crust is cooling, prepare the lemon filling.  In another large bowl, whisk together lemon juice, eggs, 2/3 cup ( 150 ml) of the condensed milk and half of the vanilla; pour over the cooled crust.  Bake in 350 °F (180°C) oven until set, 20-25 minutes.  Let cool completely. 

Lime Topping

1. Zest one of the limes to make 1 tablespoon of zest.  Squeeze and strain both limes to make 1/3 cup (75 ml) juice.

2. In a food processor, pulse cream cheese, remaining condensed milk and vanilla, lime zest, (strained) lime juice and 2 tablespoons (50 ml) sugar until smooth.  Pour over baked layer.  Refrigerate until set, about 8 hours. 

If you’re like me and find it difficult to wait 8 hours before you can sink your fork into all this goodness, plan ahead and make sure you’re distracted or at the very least, getting a good night’s sleep while it sets, however I’ll just warn you … the anticipation may make it difficult.

Notes

When you’re ready to remove the tart from the spring-form pan be sure to dip a knife in hot water and run it around the inside edge of the pan before you decide to release the clip. This will help ensure you have a clean edge without any large cracks or tears.  If you do have a rough edge just dip your knife in some hot water and use it to smooth out the tear.  Use this method again witha larger knife when you go to cut and serve the tart.  A sharp, hot knife will give you a nice, clean edge and prevent your knife from gumming up so that your servings look neat and tidy.  Or if you’re not trying to impress and you just can’t wait one more minute, cut, serve and experience a little taste of heaven. The entire dessert can be made ahead, covered without touching the top layer, and stored in the fridge.  Top with a little lemon and lime zest and you will have the most delicious dessert you’ve had  in a long time.

Source: Canadian Living 

Serves 12 wonderful people, family and friends 

 

Read Full Post »

Farmland Flax Cookies

These cookies are perfect for when a packed lunch is in order and around here,

that’s actually more often than you’d think.   These cookies combine oatmeal,

which of course is a go-to ingredient for a lot of cookies, with a handful of

ground flax seeds.  It’s an interesting combination because the flax is

crunchy and the oatmeal is chewy.  You end up with a surprising nutty

flavour.  I knew I had a winner on my hands when my husband called from

the combine just to tell me how much he loved these cookies.  Let’s just say, 

that doesn’t happen often. 

I’d love to know if you have a favourite way to serve up flax in your diet?

Why eat flax?


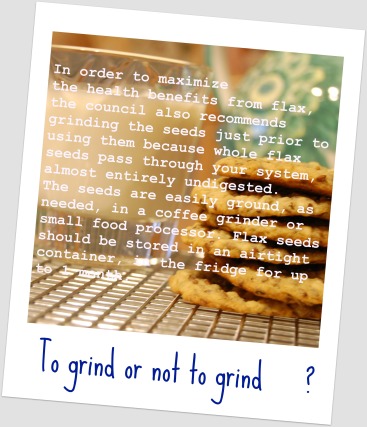
Should I eat flax whole or grinding it up?


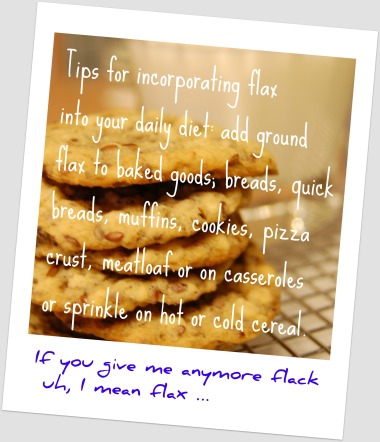
Want to add flax to your daily diet?


Canadian grown.

Adapted from Saskatchewan Flax Development Commission

Farmland Flax Cookies

1/2 cup (125 ml) butter

1/2 cup (125 ml) packed brown sugar

1/3 cup (75 ml) granulated sugar

1 egg

1/2 tsp (2 ml) vanilla

1 cup (250 ml) all-purpose flour

3/4 cup (175 ml) quick-cooking rolled oats

2/3 cup (150 ml) ground flax seeds

1 tsp (5 ml) baking soda

Method

1. Line baking sheets with parchment paper and set aside. 

2. In a bowl, beat together butter, brown and granulated sugars until light and

fluffy (approximately 8 minutes); beat in egg and vanilla.

3. In a separate bowl, whisk together flour, oats, ground flax seeds and baking

soda; stir into butter mixture to make a soft dough.  Wrap the dough in plastic

wrap and refrigerate for 10 -15 minutes.   

4. Drop by level tablespoonfuls (15 ml), 2 inches (5 cm) apart, on prepared

baking sheets.  Bake in a 350 ° F (180 °C) oven for about 8-10 minutes.   

5. Let the cookies cool in the pan, for 2 minutes before you transfer them to

the cooling rack directly.  Use a spatula with a thin, flexible blade to make the

transfer after 2-3 minutes. 

These cookies make a great addition to packed lunches for work,

school, picnics, tractors, combines or any other type of farm equipment. They

can be made ahead and layered between waxed paper in an airtight container

and stored at room temperature for up to 5 days. (I actually liked them better

the second day). They can also be frozen the same way for up to 1 month.

Makes 40 cookies. Enjoy and stay healthy!

 Love, This Sweet Wife

Read Full Post »


I’m always up for a little chips and salsa but this has a little bit of a spin on it …

fruit salsa.  Yup … that’s right … there’s no tomatoes, no onions, no peppers or

spicy jalapeno’s for a country mile.  Just fruit.  Tart apples, sweet strawberries,

ripe raspberries and delicious kiwi all mixed up together to give you a fun,

bursting with flavour taste of sweetness served up on a baked cinnamon chip.

I first came across this recipe a couple of years ago and I’ve been mixing it up

ever since. It’s a real favourite around here and makes a great dish for a fun,

summer get together.  It’s got great colour, it’s versatile, full of flavour and

chock full of vitamins. 

Fruit Salsa with Cinnamon Chips

2 kiwis, peeled and diced

2 apples, whatever suits your fancy

1 package of plump, juicy raspberries

1 pound strawberries, coarsely chopped

1 tablespoons white sugar

1 tablespoon brown sugar

3 tablespoons raspberry preserves (jam), or whatever you’ve got in the fridge

10 (10 inch) flour tortillas

Butter flavoured cooking spray

1 /2 cup cinnamon sugar, you can make this yourself, just toss 1/2 cup

granulated sugar with a teaspoon of cinnamon.  If you don’t like cinnamon or

just can’t have it, feel free to just use the sugar.

Method

1. First you’ll want to rinse your fruit and chop up everything but the

raspberries.

2. In a bowl, mix kiwi, apple, raspberries, strawberries, sugars and preserves

(which is a fancy name for jam).

Just look at all those gorgeous colours.  I even left some of my skin on the

apples for some colour.  Besides, it’s so good for you. Place your bowl in

the refrigerator while you make your cinnamon chips.

 Preheat your oven to 350 °F (175 °C).

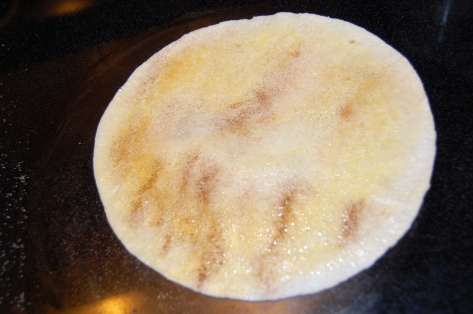
Coat one side of each flour tortilla with butter flavoured cooking spray. 

My sprinkling’s a little uneven, but you get the idea.

Cut each tortilla into 6 wedges and arrange in a single layer (important so you

get the crispiness) on a large baking sheet.  Sprinkle wedges with desired

amount of cinnamon sugar.  Spray again with cooking spray.

Bake the tortillas, in batches, in the preheated oven for 8 to 10 minutes.  Allow

to cool approximately 15 minutes.  Serve with chilled fruit mixture.

While chilling in the fridge,  the sugars start to break down the fruit and

preserves and you get a delicious juicy salsa.


Makes approximatley 3 cups of salsa and 60 chips.

Adapted from All Recipes

Enjoy! TSW

Read Full Post »